Sunday, January 13, 2013

We've moved!


We have moved the blog to our new permanent website www.rootedearth.com.  

We have lots of exciting things happening there, so check it out.  (Handmade clothing, herbal body care, dog clothes and much more!)

Or you can go straight to the blog's new home.

Hope to see you there!

xoxo

-Sara & Pieter


Saturday, February 25, 2012

We're back! - Seed Starting Series - Part 1 - General Tip and Tricks

It has been over a year and a half since my last post!  The wedding planning, wedding, honeymoon, and settling back in to a "normal" life, and school starting back up again took over our lives.  But, we are married now (woohoo!) and getting back into the groove of things. 


Our wedding was the best day ever and our honeymoon was a trip of a lifetime.  I hope someday soon to do a wedding post and honeymoon post. 

But, for now, we are looking forward to the Spring!!  I can't wait to get my hands and feet in the soil again and feel the sun on my face and back. 

I want to do a series of posts to help everyone get their seeds started correctly and successfully.  You might think starting seeds is easy:  put some seeds in some soil, give them some water and you're all set...but there is MUCH more to it than that, especially if you want to start a lot of different seeds for your garden.  Here are some basic tips, tricks, and information to help you get started, there will be more to come in future posts!


Why Start Your Own Seeds?

There are a few different reasons to start seeds yourself.  I believe a few of them are especially important.    

The first is that it can really save you a lot of money.  Seeds are much cheaper to buy than seedlings.  You can order seeds with a friend or neighbor and share packets to cut down on your costs.  Also, most seeds will last more than 1 year (2-3 is the average), so if you don't need the whole package the first year, just store them for the next year (in an airtight container in the refrigerator is best).  If you do this, it is a good idea to test the viability of the seeds before you plant them the next year (if you have enough to do this).  Just put them in a moist paper towel in an open plastic bag, keep moist in a warm place until germination and see what the rate of germination is so you know how many to sow (50% germination means you should sow 2 seeds in every cell to hopefully get close to 100% of your cells filled with seedlings).  You can always sow more than that and thin them out later, it just depends on your preference and how many seeds you have.  

The second reason to start your own seeds is that you have an unlimited number of varieties to choose from.  There are so many amazing different varieties of every plant out there, why limit yourself to what the local nursery decides to offer that year?  (Obviously supporting your local nursery is a wonderful thing to do - NEVER buy your plants from a "big box" store -  but I like to save my nursery purchases for supplies and woody trees and shrubs as they are harder to start from seed - but most are easy to propagate yourself, however, that is for a future post.)

The third important reason is that you have much more control over your plants.  You will be 100% sure they are grown organically.  Also, if you do it correctly, your plants will be a lot stronger and able to adjust to changes in the environment.  Plants grown for nurseries and big box stores are either "babied" or neglected.  They are grown either under ideal conditions for lush vegetative growth - max light, perfect temp, and lots of fertilizers, so when you are looking at them to buy them, they look amazing.  However, they can often be leggy or weak or so used to these conditions that they aren't strong enough to handle the non-ideal conditions in your garden.  So, while they will probably live just fine, they will take much longer to recover from transplanting and acclimating to your environment.  The other side of seedlings, usually the ones grown for big box stores, are fed so much fertilizer to overcome the less than ideal conditions they are grown in, the same thing happens when you transplant them into your own garden.  You want your seedlings to have some stress so they grow strong!  They need to dry out between waterings (not for too long though!).  They don't need fertilizers as much until they have a few sets of true leaves.  If you give them too much fertilizer (especially nitrogen), the plant is going to put so much energy into growing vegetative tissue (stems and leaves) that the roots will not grow like they should and will not be able to support the top of your plant.  You want an extensive root system so that you plant has the support it needs as well as the ability to take up as much water and nutrients as it can (high surface area).    

The last reason is because it's FUN!  You will feel much more accomplished and have a better relationship with your plants.  Plus, you will learn a lot each year.

Where to Begin?

The first place you want to start is buying your seeds and planning your garden.  Hopefully, by this time of the year, you have already done this.  I'm not going to get into the details of planning a garden, but will give you some tips for picking seeds.

There are a few different types of seeds that you can get...organic, non organic/conventional, F1 hybrids, heirlooms, rootstock, etc....  

First - organic - the meaning of organic varies depending on the certifying agency.  Generally though, organic seeds are grown organically for at least 3 years before they are certified organic.  One of the biggest misconceptions about organic food/seeds/plants is that they are pesticide and chemical free.  However, organic growers can use approved pesticides and chemicals, just not synthetic ones.  One of the best parts about organic seeds is that they are guaranteed to not be GMO/GEO (genetically modified/engineered organisms).  Also, in general, the farms growing organic plants (for seed or otherwise) are more environmentally responsible which has many, many benefits...again, some of this is for a later post as it is quite complicated, but organic seeds ROCK!  Another misconception is that if you use seeds that are not organic,  your garden is no longer "organic"...if there is no option to buy a variety organically (such as my favorite Sun Gold tomatoes), organic growers can still grow these plants and it does not change their organic status. 

F1 hybrids are the first generation of crossing two parent plants.  They show "hybrid vigor" which means that, in general, they are stronger, grow faster, produce more flowers/fruits, and are just "better" overall than non F1 hybrids. (I put better in quotes because this can be argued with: see heirlooms, below).  This also makes them more expensive.  In general, I think it's worth the extra money for some varieties that I love, though I don't think your garden should be all F1's.  You cannot save seed from F1's because they will not hold true to type 50% of the time.  So you have to buy the seeds for these each year.

Heirlooms are open pollinated plants (sometimes referred to as landrace).  They are old varieties that have been grown for so long that they produce true to type from collected seed.  There are a lot of local heirlooms that have grown in an area for so long that they do especially well there.  You can collect and save seed from these plants without worry:  you will get the same plant year after year and each year your plants will be stronger and better than the last because they are becoming more and more acclimated to your environment in your garden.  I love heirlooms and think they should have a prominent place in every garden.

Rootstock seeds are for grafting (tomatoes, eggplants, melons, etc..) and are generally strong, wild varieties that improve the qualities of your commonly grown and loved varieties when grafted together.  These are only used for grafting.

Dates - When to Start Indoors and When to Plant Out

 So once you have your seeds and supplies (growing media is going to be my next post, so watch for that soon, maybe tomorrow!  I will also address lighting at some point soon too) you  need to figure out when to start them.  Johnny's Selected Seeds has this amazing tool that I use every year to help me with this, check it out here!  This takes out all of the math of figuring out when to start your seeds, which can save a lot of time if you grow a million different plants like I do.  You just need to know your frost free date, which you can find out from your local Cooperative Extension if you don't know it.  I always use the last weekend in May as my date.  There is only a 10% chance of a frost at this point.  Some seeds and seedlings can be planted before this date and some need to be planted later depending on if it is a cool-season crop (such as peas) or warm-season crop (such as tomatoes).  

Once I enter my frost free date into the Johnny's tool page, I use the dates on the chart to separate my seeds into planting groups.  First, I separate out my direct sowing seeds, the ones that I will sow directing into the garden and will not start inside.  Many plants don't need to be started inside (lettuce, spinach, beets, kale, etc...), and some really hate being transplanted, their roots hate to be disturbed, and really must be started outside (such as cucumbers, beans, squash, corn, etc...).

Next, I use big plastic bags with the dates labeled on them (you can reuse these every year) to separate my seeds into groups of what needs to be planted when.  This makes it very easy to know what I need to plant each weekend throughout the season.  


Also listed on the chart from Johnny's is the date to plant them outside.  Which can be weeks before your last frost free dates, right around it, or weeks after.  This is very important information as many plants can not tolerate any frost at all.  I write this date on my plant tag that I use to label my seedlings so I know when they should be planted out.  Obviously you want to harden them off before transplanting, but that will be something I address in a future post when it gets closer to that time.

What We Are Planting This Weekend!

It's already time to start planting!!  This weekend I am starting:  Onions (Ruby Ring, Redwing, Purplette, and Cortland), Lavender Vera, Creeping Thyme, German Winter Thyme, some Spinach for an early crop, Bandit Leeks, Dark Green Italian Parsley, Giant of Italy Parsley, and Greek Oregano.

What are you planting now??

Coming soon:  seed starting media, lighting, how to start and aftercare, and transplanting out.  

Is there anything you'd like me to cover in the future?  Any questions?

Happy planting!

xoxo
Sara


Saturday, September 4, 2010

Cleaning the house, naturally!

I need to do a normal blog shortly, but I wanted to share some recipes for all natural house cleaners.....the cleaners you buy in the store are filled with nasty chemicals and cost so much more than making simple cleaners at home.

When you run out of your normal house cleaners, save the spray bottles, get a few glass jars and some basic ingredients:  baking soda, borax, apple cider vinegar (or white, if you prefer), alcohol, and essential oils of your choice.....my favorites to use are:  lavender, rosemary, lemon, orange, thyme, and eucalyptus. 

You can really do all of your house cleaning with just apple cider vinegar and baking soda if you wish.  Use the baking soda as a gentle scrub for your sinks, bathtub, toilet, and stove and use the vinegar (you can dilute it with some water if you'd like, but either way the smell will go away quickly so don't worry) on glass/windows/mirrors and your counter tops.  You can also add vinegar to your wash for stains such as alcohol, coffee, fruit juice, wine, etc....

If you'd like to get a little more creative and have yummy smelling cleaners (that also have extra disinfectant and cleaning properties), use these ideas:

LAUNDRY-

Smelly laundry-
For towels or other things that have a mildew smell (or other hard to remove smells like skunk if you have a dog or urine if you've got little ones) use your normal detergent (an earth friendly, unscented one like the one from Method is a good one, or make your own, below) and add 1/2 cup of the mixture below:
1 tablespoon essential oil (rosemary is a favorite, but lavender is nice as well)
1 cup borax
Combine thoroughly and store in a glass jar.  It doesn't go bad, it keeps forever.


Detergent-
1 tablespoon  essential oil (again, lavender or rosemary is great!)
1 cup baking soda
Combine thoroughly and store in a glass jar.  It doesn't go bad, it keeps forever.  Use 1/2 cup per load as you would any normal detergent.

Scouring Powder (gentle)-
1 1/2 Cups baking soda
4 1/2 teaspoons essential oils (my favorites are lemon, orange, thyme, or a combination of them)
Combine thoroughly and store in a glass jar.  Sprinkle on a damp sponge as needed and scrub tubs, sinks, stoves, and toilets.  Rinse well with water.

Air Fresheners-
When vacuuming, add a cotton ball soaked in an essential oil into the bag or compartment that you empty...it blows out the air that smells like the essential oil.  Freshens the air while you vacuum!

Add a drop or two of essential oil to a light bulb before turning it on.

Fill a pan with water...add essential oils of your choice, or vanilla extract with cinnamon and/or allspice and bring water to a simmer...your house will smell amazing!

Carpet Freshener-
2 cups baking soda
1 teaspoon essential oil of your choice
Combine thoroughly and sprinkle on your carpet....let sit at least an hour, but overnight is better...vacuum up!

Glass Cleaner-
3 cups water
1/3 cup apple cider vinegar (steep with herbs for a week before if you want for an even better cleaner!)
A few drops of essential oil of your choice (lemon or orange is my favorite)
Put into a spray bottle, shake and use as you would any glass cleaner.  (keeps for about 6 months)

Disinfectant Spray-
In a spray bottle, mix:
1 cup water
1/2 cup alcohol
1 or 2 teaspoons of essential oil (lemon and/or lavender is my favorite)
Shake and spray into air or onto surfaces (not varnished wood) leave on surfaces for 10 minutes and wipe clean w/water.

All purpose cleaner-
In a spray bottle, mix:
2 cups water
1/4 cup apple cider vinegar
1/4 cup lemon or lime juice (optional)
4 drops of essential oil (lemon or orange)
1 teaspoon borax
1 teaspoon liquid castile soap (you can get this from From Nature with Love or use Dr. Bronners.

Shake well before use.  Great on all surfaces except varnished wood.


Dish Soap-
Mix:
Two cups of castile soap
1 tablespoon glycerin
1 tablespoon essential oil (lemon is my favorite!)
Use as you would a normal dish soap.  You can also use this as a body wash!

If I have left anything out that you use often and want to see how you can make it at home, leave me a comment....I know a bunch more things to use as cleaners, but these are just the most common.

Here's to a healthier and happier home!

Monday, August 9, 2010

Harvesting, deer-proofing, family forest walks, turkeys, berries and more!

As always I have a ton to get caught up on for this blog, so it will be another long one.  
 
We have been having quite a few deer and turkey sightings which are always fun, hopefully one of these times I'll have my camera so I can get pictures!
 
We have been cooking up a storm as always; however, I forget to take pictures most of the time (I am trying to do better w/that.)  It has been SO much fun using the food from our garden to create amazing, delicious meals and even more fun to eat them.  
 
Earlier in the summer I made Kaya some more organic dog cookies (she's on a diet now since her hunting vest no longer fits her, so this was the last batch for awhile.)  I also made a strawberry rhubarb crisp with the strawberries from our field/forest and rhubarb from the yard, it was amazing!
 

Yummy tofu/tomato/lettuce/cucumber/cheese sandwich: 


Pieter made a risotto with the sweet peas from the garden and it was my favorite risotto yet (though I think I say that with each new one that he creates.)  The peas had such an amazing flavor!


 Our friends Kaitlyn and Kim came to visit for the 4th of July weekend.  We started the weekend off meeting them in Rockland at Primo for another incredible meal.  Primo is by far my favorite restaurant that I've been to.  They have a beautiful property with a great farm to table set up.  The staff is very knowledgeable and attentive and we always have the best time there!  Kim is moving to Cali with her boyfriend and we wish her the best of luck!
 

The weekend ended with Piet's birthday.  Kaya got sprayed by a skunk which made for a smelly birthday for Pieter.  He made a veggie lasagna that was the BEST lasagna I've ever had.  He used veggies from our garden and the farmer's market and it was soooo good.  

 
For one of his birthday presents, I got Pieter one of the little grills so that we could finally cook out.  Even though it is small we have been really enjoying it.  Veggie burgers, veggie dogs, corn on the cob and yummy potatoes!  


My mom got us an awesome tent room so that we can sit outside when the bugs are bad.  We've been using it to eat our cookout food in!

We had a blight scare (the University confirmed that it wasn't blight) so we pulled up a couple of our potato plants and had a nice treat of early potatoes.  They were the creamiest, tastiest potatoes I have ever had.  YUM!


Our snake friends are still hanging around everywhere....


Piet went to California for Jeff and Lauren's wedding and had an awesome time!  Kaya and I missed him a lot though and Kaya waited patiently for him to arrive home.


This woodpecker hangs out by the bird feeder constantly and is slowly pecking our wooden post away, but he sure is cute!!


We have had an abundance of berries - blueberries, raspberries, and blackberries!


I got some new plants for the front flower garden - 3 lavender plants, a lily plant, and a flox plant.  I've ordered some more bulbs to plant in the fall so next year this flower bed should look great all throughout the spring, summer and fall.  I also found some untreated, uncolored mulch to apply to all of the flower beds and the herb garden, which made them look much better!


The flox 'David' plant:


The Asiatic lily plant:


 The herb garden before I added the mulch and before I had to cut all of the mint and catnip for the electric company guy (too many bees):


 After mulching and cutting the mint and catnip:


The wild flower garden by the front door just keeps growing and growing with more blooms every day.  It's really great!


 The flower garden by the barn has been gorgeous all summer.  The morning glories are very full with lots of blooms and the mini gladiolas have been a delightful surprise every time a new bulb opens with a different array of colors.


 The vegetable garden has been doing really well, we've been able to harvest something from it almost every day for quite awhile now.  The zucchini, summer, and yellow crookneck squashes produce really beautiful flowers.


 The zucchinis and squash are really cute when they are tiny.


The zucchini and squash plants grow so quickly!  You can see the huge difference in just a month.


Our pickling cucumbers are a bit delayed, but they are almost ready for the first harvest!


Our tomatoes also seem a bit delayed but our yellow Taxi tomatoes are finally coming, hopefully the rest of the tomatoes will follow soon!


The flax flowers are beautiful!


 The broccoli plants are huge and finally flowering.  Not sure if I'll grow it again next year, the plants are SO big for very little broccoli.


The bush bean and French filet bean plants are highly productive, we've been eating at least a handful of beans every day for a couple of weeks now.


Our Rhubarb Swiss chard plants have been one of our favorite and most productive of the garden.  We cook it down with a little olive oil and garlic, it's SO delicious.


 We got a decent amount of garlic (all of our cloves that we planted were successful.)  We are definitely planting about three times as much this fall as we use about a full head of garlic everyday.  Our garlic is nice and spicy and soo yummy - a million times better than the garlic from the store!  Plus you get a ton of the scapes to cook with from the hardneck garlic, a great added bonus!


The corn is growing quickly and finally starting to pollinate each other and we have some silks forming!


We've gotten a handful of carrots so far with a ton more almost ready and even more for candy carrots after the first frost.


 We harvested a TON of sweet peas, they were so good!  We will be planting more next year, I want to try two different varieties.


 Lettuce was, of course, our easiest and fastest growing crop (besides the radishes).  We have three different lettuce mixes along with four different types of head lettuce growing and have harvested a lot already with a ton more still growing.


We harvested a few beets with a lot more still growing, some nearly ready, some younger so they can be harvested in the fall.


 Our landlord has been very generous with his cucumbers and I've made almost 30 jars of pickles so far!


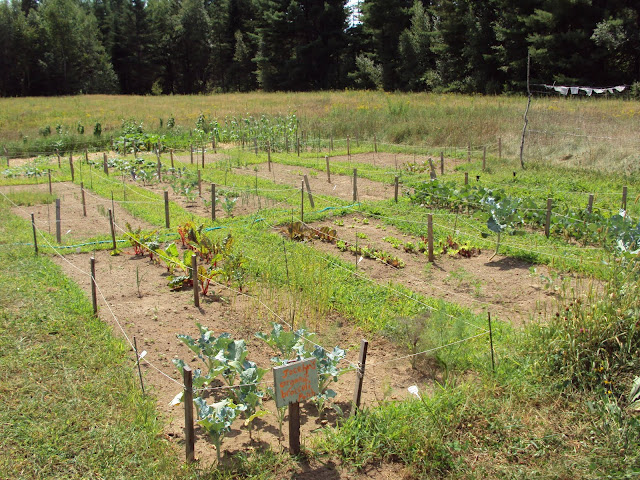
 Random pictures of the veggie garden:


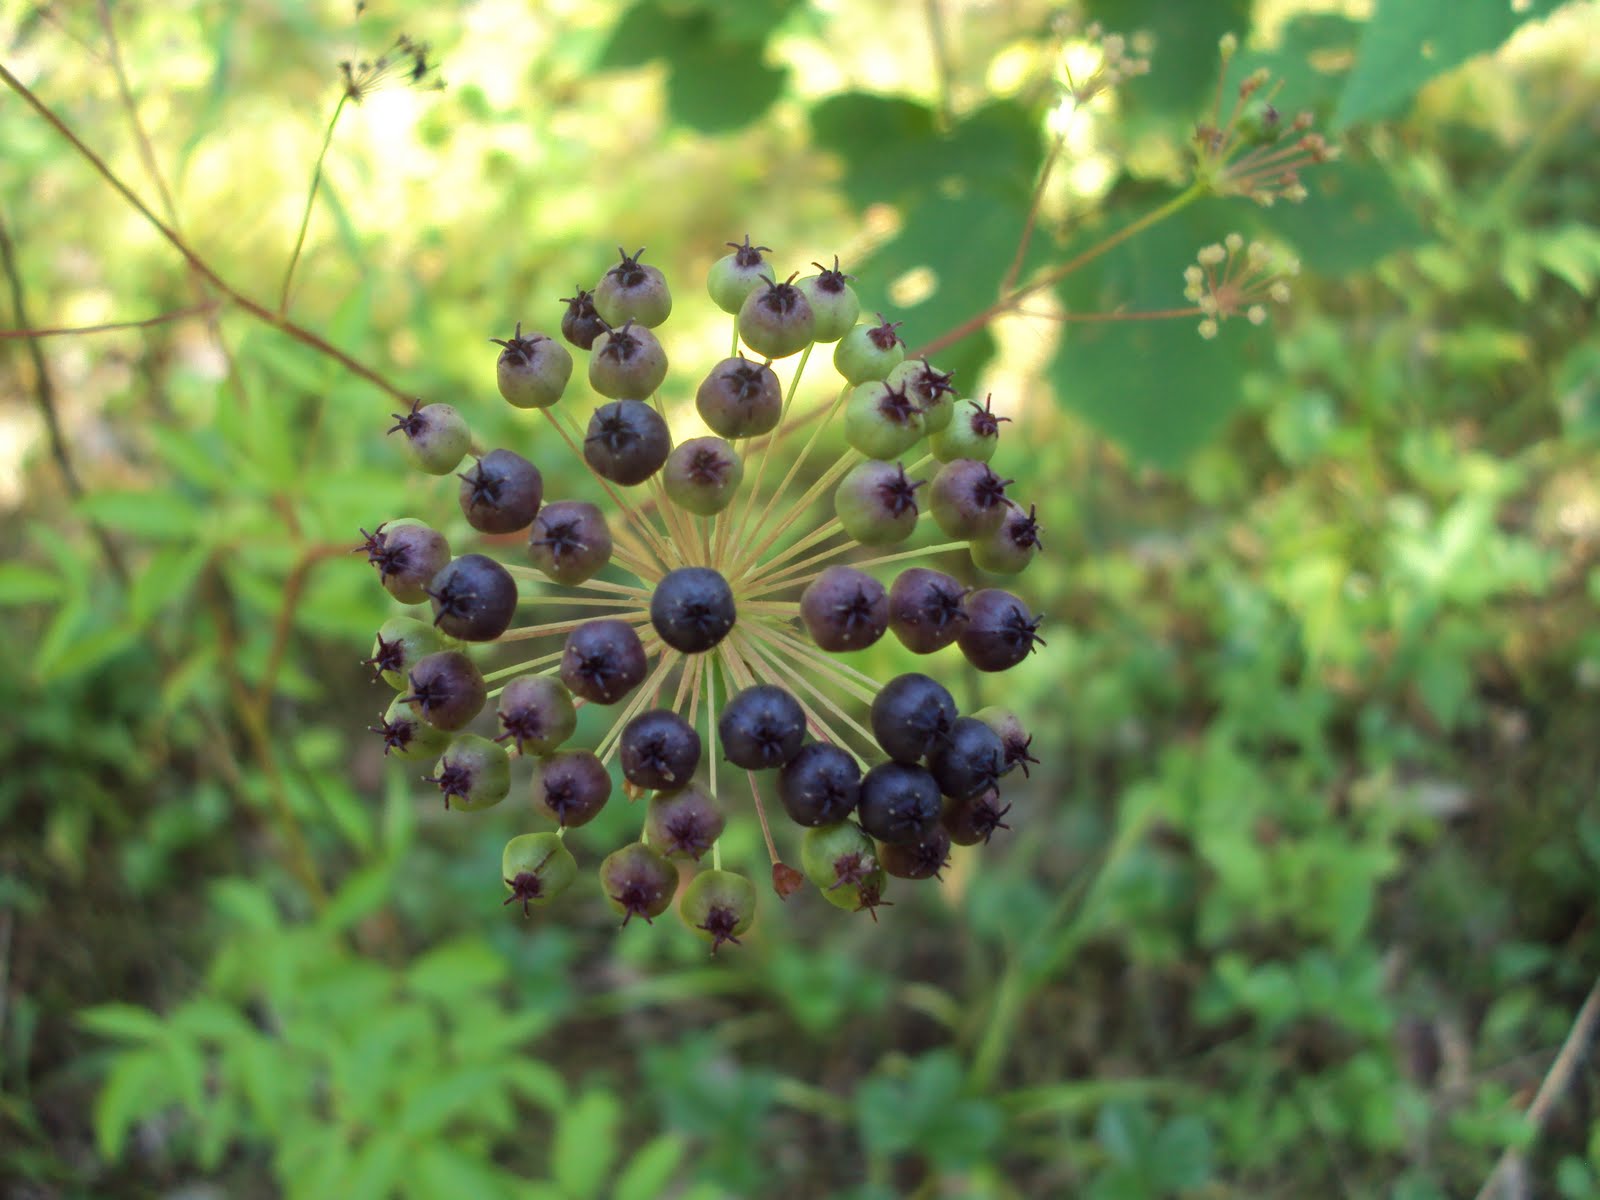
Random pictures of forest things from some of our "family forest walks":


This butterfly seemed to be following us one day:


This poor butterfly was almost completely missing one of it's wings,  it made me really sad :(


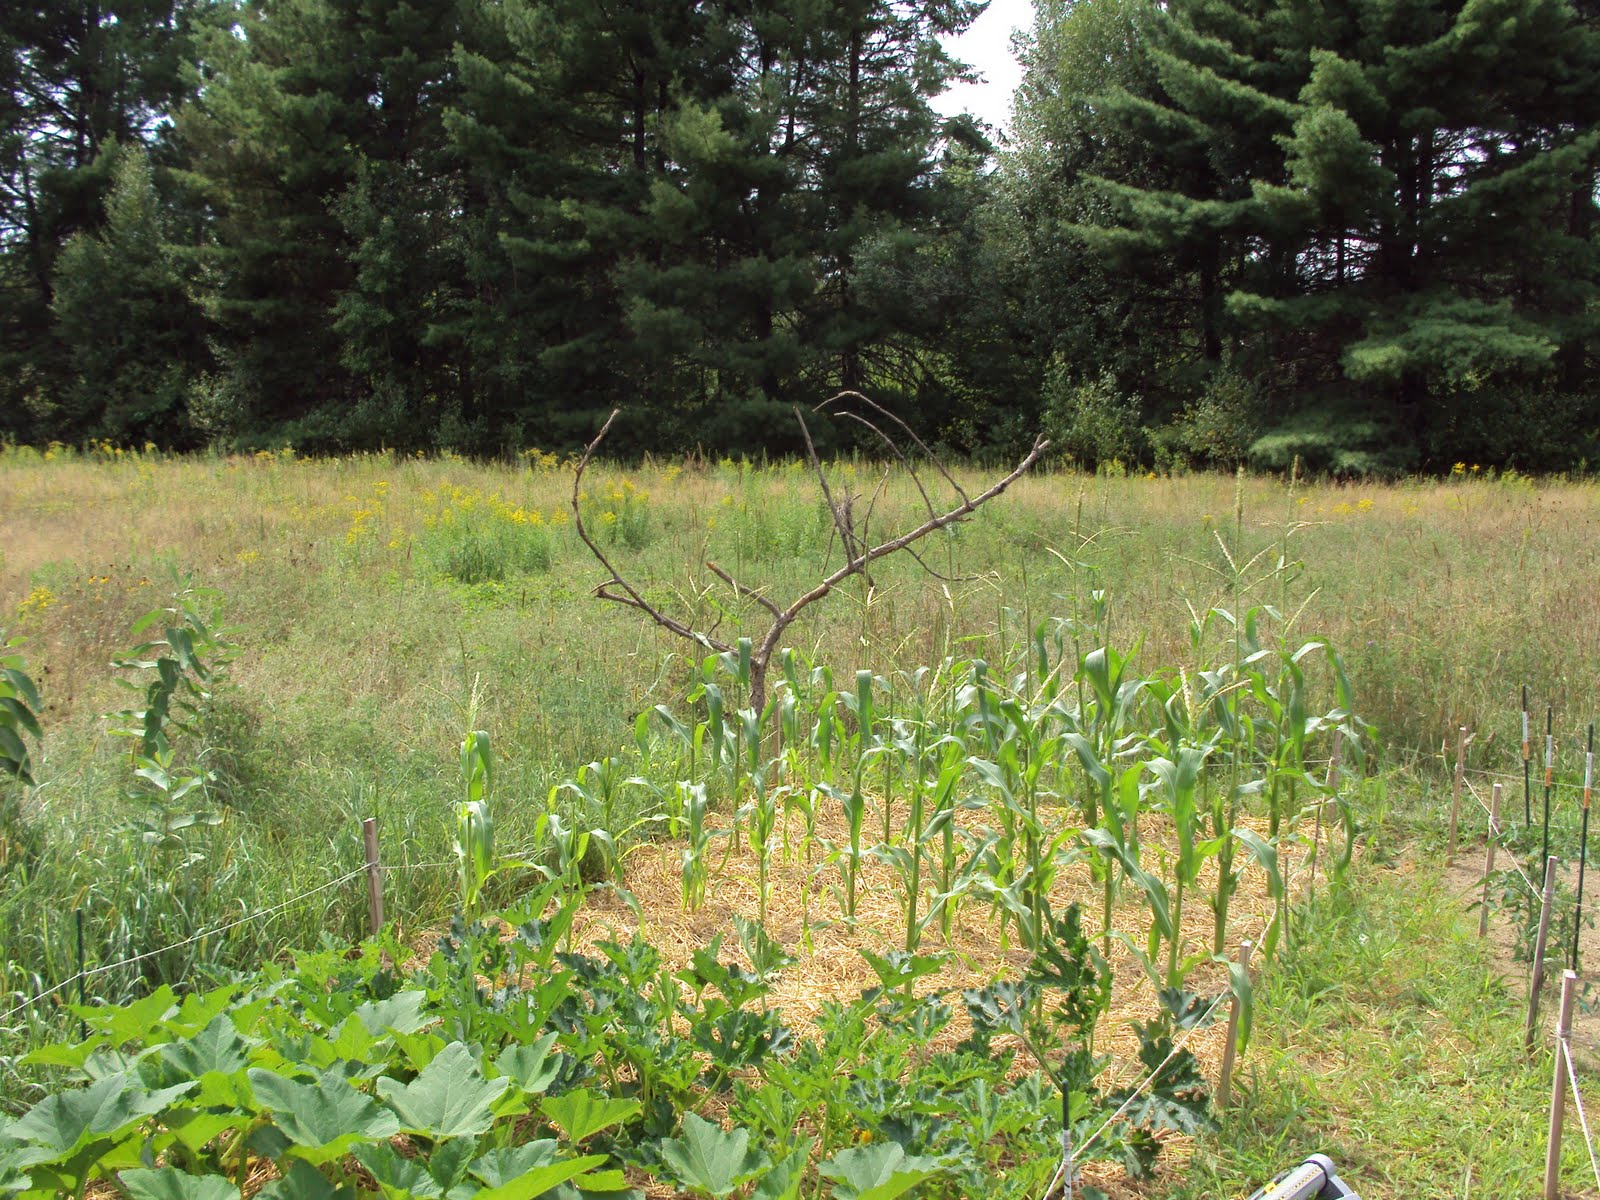
We had a deer eat most of our melon and acorn squash plants and a couple of our zucchini plants (and a couple of almost ready zucchinis).  So with some advice from the aunties and mom we set out to deer-proof the garden.  I collected some big fallen branches from the woods and dug some holes to put them in.  Pieter went into town and got some pie plates and nylons for Kaya's hair.  I attached everything to the branches and string and so far, so good!  It's definitely noisy in the wind so we're hoping that will keep them away from the garden!


We woke up this morning to find that we had unintentionally caught four little mice in our weeding bucket!  They were released into the field, so I'm sure we'll see them again!

Until next time, 
Sara & Pieter

Keep it local and organic!